
Natural beauty for your favorite space

7 Tips for Choosing the Best Shoe Stretcher Tree?

A good Shoe Stretcher Tree should support your shoes without forcing them wider or changing their shape. That sounds simple. In practice, shoppers often focus on size alone and overlook toe shape, material, and adjustability. A narrow dress shoe, a rounded loafer, and a soft leather boot may need different support. Even a well-made tree can feel wrong if its front section presses hard against the vamp.

Shoe-care educator Kirby Allison is known for practical guidance on caring for fine footwear. The line below is an editorial summary of that guidance, not a verbatim quotation: “Choose a tree that supports the shoe gently, never one that strains it.” That distinction matters. Stretching can help relieve mild pressure, but it cannot reliably fix a poor fit or reshape every material. A little restraint helps.

This guide presents seven tips for comparing wood and plastic models, checking fit, choosing adjustable designs, and using a tree safely. You’ll also see why cedar’s moisture-absorbing qualities appeal to many owners, while budget and storage needs still deserve a look. Check the heel, too. A tree that rocks or slips may provide uneven support. And if the shoe feels tight before stretching, pause and reassess; more pressure is not always better. The right choice should feel secure, leave no harsh bulges, and make routine shoe care easier—not turn a small fit concern into a bigger one.
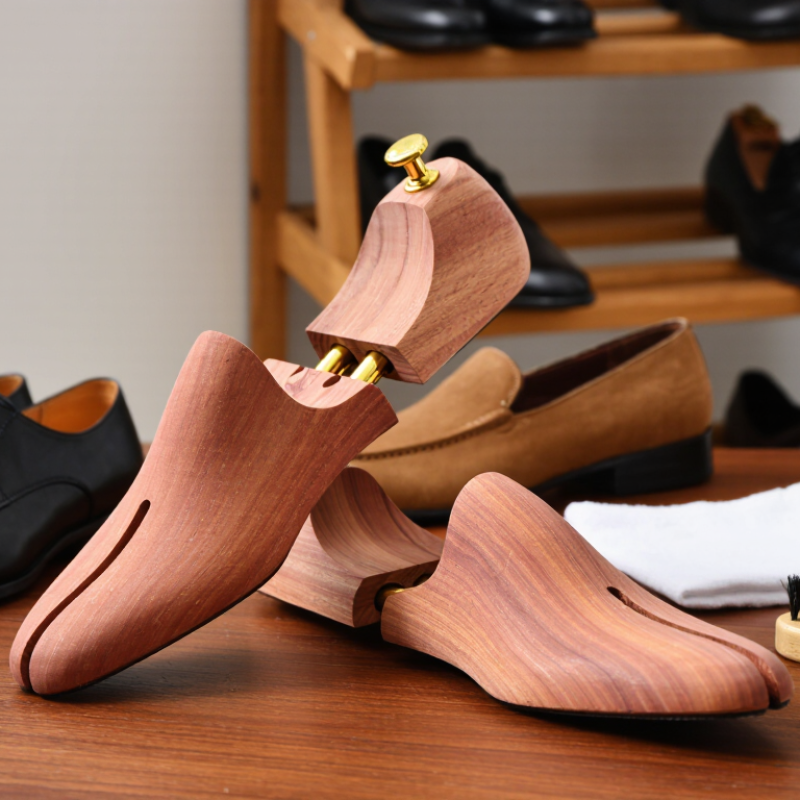
7 Tips for Choosing the Best Shoe Stretcher Tree?

Measure Both Feet at Day’s End, Following APMA Fit Guidance

Measure both feet near the end of the day, when they may be slightly larger. APMA fit guidance recommends measuring both feet while standing and fitting shoes to the larger one. A small difference matters. Wear the socks you expect to use with the shoes. Have a trained shoe fitter check length and width, or trace each foot on paper and compare carefully. Tracing is only a rough check; it can miss differences in foot volume. Note the longer foot, the wider foot, and any pressure points.

Use those measurements before choosing a stretcher tree. A tree can gently ease tight spots, but it cannot reliably fix shoes that are too short or fundamentally too narrow. Leave room for your toes to move, and check that your heel does not slip when walking. If one shoe feels snug across the forefoot, a width-adjusting stretcher may help gradually. Avoid forcing it. I would not rely on a tree to solve every fit problem; that assumption is easy to make, and often disappointing. If discomfort remains, try a different size or shape rather than stretching harder.

Use ISO 9407 Mondopoint to Compare Foot Length and Width in Millimetres

A shoe stretcher tree should ease pressure, not turn a poorly fitting shoe into the right size. ISO 9407 uses Mondopoint sizing, expressing foot length and, where stated, width in millimetres. Measure both feet while standing, with the socks you usually wear. Note each measurement separately; feet are often slightly different. Small differences matter.

Tips: Compare your measurements with the shoe’s stated Mondopoint size, including width when available. A length match alone may still leave the forefoot tight. Choose a stretcher that adjusts gently across the area causing pressure, such as the ball of the foot. Avoid guessing from a familiar size label, since sizing systems can vary.

Use the stretcher gradually, checking the shoe after a few hours rather than forcing a dramatic change overnight. Leather may respond differently from synthetic materials, and some shoes stretch very little. Stop if seams strain or the upper distorts. A millimetre reading is useful, but it cannot describe every fit issue; instep height and toe shape also affect comfort. I would remeasure before making a second adjustment, even when the first seems obvious.

7 Tips for Choosing the Best Shoe Stretcher Tree? - Use ISO 9407 Mondopoint to Compare Foot Length and Width in Millimetres

Use foot measurements in millimetres as a starting point; a stretcher adjusts a shoe and is not a substitute for correct shoe sizing.
Tip What to compare Mondopoint check Practical selection guide
1. Measure both feet Measure each foot while standing, wearing the socks intended for the shoes. Record the longer foot and the wider foot. ISO 9407 Mondopoint expresses foot length in millimetres and may also include foot width in millimetres. For example, record a measured foot as 260 mm long and 100 mm wide. These are illustrative measurements, not a shoe-size conversion.
2. Match the stretcher to the shoe type Check whether the tool is intended for the shoe’s style and construction, such as a closed-toe shoe, boot, or open shoe. Compare the shoe’s intended fit with the measured foot length and width; Mondopoint describes the foot, not the stretcher’s dimensions. A standard two-way stretcher is generally suited to many closed-toe shoes. A boot may need a longer handle or a boot-specific shape.
3. Check length adjustment Look for controlled adjustment along the shoe’s length and a size range that covers the shoe being stretched. Use the foot-length measurement in millimetres to assess fit. Do not assume a stretcher’s size label directly equals a Mondopoint measurement. Length adjustment may help relieve mild tightness, but it cannot reliably make an undersized shoe fit properly.
4. Check width adjustment Confirm that the stretcher can apply lateral pressure and that its shape suits the shoe’s toe box. Compare the foot-width measurement in millimetres with the shoe’s fit information where available. Width labels and grading can vary by sizing system and manufacturer. Choose a model with controlled width expansion if the shoe is tight across the forefoot. Avoid forcing the shoe beyond its construction limits.
5. Consider pressure-point accessories Check whether removable plugs or pads can target a bunion area or another local pressure point. Mondopoint length and width do not describe the location of a pressure point; assess that area separately while wearing the shoe. Use a targeted plug only where needed. Broad, gradual adjustment is usually preferable to concentrated force across delicate material.
6. Choose a suitable material and finish Inspect the stretcher’s body, moving parts, and contact surfaces for smooth edges and sturdy construction. Foot measurements help select fit, but they do not indicate which stretcher material is suitable for a particular shoe. Use a tool compatible with the shoe’s material and follow its care instructions. Delicate or coated materials may need extra caution.
7. Adjust gradually and recheck Prefer a mechanism that allows small adjustments and can be left in place according to the product instructions. Recheck comfort against the measured foot dimensions, but remember that foot shape, shoe shape, and material also affect fit. Apply modest pressure, inspect the shoe, and repeat only if needed. Stop if seams, stitching, or the upper show signs of strain.

Measurement note: ISO 9407 uses Mondopoint to state foot length, with foot width optionally stated as a second measurement, in millimetres. The example 260/100 mm means a foot length of 260 mm and a foot width of 100 mm; it should not be treated as a universal shoe-size conversion.

Gauge Size Changes Against ISO 19407’s 6.67 mm Paris-Point Steps

7 Tips for Choosing the Best Shoe Stretcher Tree?

When comparing stretcher sizes, use ISO 19407’s Paris-point step as a reference, not a promise of fit. One Paris point equals about 6.67 mm in length. That is a useful scale for understanding size changes. It does not mean every stretcher expands a shoe by exactly 6.67 mm.

Check the shoe’s marked size and the stretcher’s adjustment range before buying. Some stretchers use broad size bands, so the label may cover several shoe sizes. Measure the shoe’s inside length if possible, and compare it with the maker’s sizing chart. Leave room for the toe shape and lining. A pointed shoe and a rounded shoe can feel different at the same measured length.

Don’t confuse length with width. A stretcher may widen the forefoot without changing the shoe’s length in a predictable way. Adjust it gradually, then check the leather or other upper material after a few hours. Too much pressure can distort seams or leave a bulge. I find size charts reassuring, but they can make fit look more exact than it is. Use the 6.67 mm interval to compare sizes, then let the shoe’s shape and your foot’s pressure points guide the final choice.

Match the Stretcher’s Toe Shape and Stretch Direction to the Fit Problem

A shoe stretcher works best when its toe shape follows the shoe’s natural outline. A rounded stretcher can distort a narrow, pointed toe, while a pointed one may leave pressure spots in a broad, round shoe. Check the fit problem before choosing a tool: tightness across the ball of the foot calls for gentle width expansion, while a cramped toe may need slight length adjustment. Some stretchers also accept small pressure pads. Place one over a bunion or a specific rubbing point, not wherever extra space seems useful.

Direction matters. Turn the width mechanism gradually to ease pressure across the sides; use the length adjustment only when the shoe feels short at the front. Small changes matter. Leave the stretcher in place for several hours, then test the shoe indoors and adjust again if needed. Avoid forcing it: seams can strain, and delicate materials may respond poorly. Leather often relaxes with careful stretching, but synthetic uppers can be less predictable. A slightly imperfect fit is sometimes safer than chasing a perfect one. If the shoe still pinches after modest adjustments, the shape may simply not suit your foot.

Test Gradually and Recheck Fit Without Exceeding the Shoe’s Safe Stretch

A shoe stretcher should ease pressure, not force a shoe into a new shape. Turn the adjuster a small amount, then leave it in place for two to three hours. Remove it and try the shoe with the socks you normally wear. Check the tight spot while standing; feet spread under body weight. If the leather creases sharply, seams pull, or the shoe feels distorted, stop. Some materials and glued constructions tolerate less stretching than others.

Tip: Mark the pressure point with a small piece of removable tape. Adjust only that area, then recheck both shoes. A 2018 study in the Journal of Foot and Ankle Research reported that 63% of older adults studied wore shoes shorter than their feet, while 72% wore shoes too narrow. That finding supports checking length and width, rather than assuming every pinch needs more stretching.

Repeat in small increments, with a few hours between checks. Comfort should improve without creating heel slip or loose folds. I sometimes want to turn the handle one more time; that impatience can be the mistake. Stop if the fit worsens, and ask a qualified shoe repair professional about delicate materials or stubborn pressure points. There is no universal safe stretch amount. Recheck after wearing the shoes indoors briefly.